BLOG SUSPENDED

As the business matures, I’m now spending a little time writing about gardening. Nothing grand, but just my own take of how to do things in the garden.

We get asked all the time, about different aspects fo gardening, different plants, different techniques. We post on Facebook but one day soon, I’ll start creating a ‘Plant Man guide’ on gardening that can be read on the website here.

It’ll be my own interpretation of how to do things. It won’t necessarily follow what everyone else says; it’s what I’ve learned after gardening for over 30 years. There’s no ‘right’ or ‘wrong’ answer with gardening, a lot of the time. This is my take and I hope you’ll enjoy it.

And if there’s anything you’d like to read about, you can always email in to us and tell us what you’d like to hear about. We look forward to hearing from you!

Just a bit of fun....

Well there’s really no reason to post this as it will do nothing help you improve your gardening skills!

But it might just put a little smile on your face…..

naked man orchid.jpg

Naked Man Orchid

Orchis italica, commonly known as the naked man orchid or the Italian orchid, is a species of orchid native to the Mediterranean. It gets its common name from the lobed lip of each flower which mimics the general shape of a naked man. In Italy, it is believed that the consumption of the plant is conducive to virility. It prefers partial shade and low nutrient soil and flowers in April. O. italica grows up to 50 centimetres in height, with bright pink, densely clustered flowers. They are found commonly and widespread in the Mediterranean in large clusters.

naked man orchid2.jpg

Orchis italica

monkeyface orchid.jpg

Monkeyface Orchid

Dracula simia, called also monkey orchid or the monkey-like Dracula, is an epiphytic orchid originally described in the genus Masdevallia, but later moved to the genus Dracula. The arrangement of column, petals and lip strongly resembles a monkey's face. The plant blooms at any season with several flowers on the inflorescence that open successively. Flowers are fragrant with the scent of a ripe orange.

monkeyface orchid2.jpg

Dracula simia

dove orchid.jpg

Dove Orchid

Peristeria elata is a species of orchid occurring from Central America to Panamá, Venezuela and Ecuador. It is the type species of its genus. It is commonly referred to as the Holy Ghost orchid, dove orchid or flower of the Holy Spirit in English, and, as the flor del Espiritu Santo in Spanish.

doveorchid2.jpg

Peristeria elata

hookerslips.jpg

Red Lips

Palicourea elata, commonly known as hot lips red lips, and some less polite common names!, is a tropical plant native to rain forests in Central and South American countries such as Costa Rica, Ecuador, Panama, and Colombia. It can adapt to temperate climates. It is notable for its distinctly-shaped red bracts.

hookerslips2.jpg

Palicourea elata

white egret orchid.jpg

White Egret Orchid

Pecteilis radiata is a species of orchid found in China, Japan, Korea and Russia. It is commonly known as the white egret flower, fringed orchid or sagisō. It is not to be confused with the white fringed orchid Platanthera praeclara, which is a North American species. The Sagiso is the official flower of Setagaya ward, Tokyo.

whiteegretorchid2.jpg

Pacteilis radiata

carrionflower.jpg

Titan Arum

Amorphophallus titanum, the Titan Arum, is a flowering plant with the largest unbranched inflorescence in the world. It is endemic to Sumatra.

Due to its odour, which is like the smell of a rotting corpse or carcass, the Titan Arum is also often known as a Carrion Flower.

carrionflower2.jpg

Amorphophallus

titanum

ballerina orchid.jpg

Ballerina Orchid

Caladenia melanema

Caladenia melanema, commonly known as the ballerina orchid, is a species of orchid endemic to the south-west of Western Australia. It is a rare orchid with a single erect, hairy leaf and one or two cream-coloured to pale yellow flowers with red markings and black tips on the sepals and petals.

batflower.jpg

Bat Flower

Tacca chantrieri, the black Bat Flower, is a species of flowering plant in the yam family (Dioscoreaceae). It is an unusual plant in that it has almost black flowers, up to 12 inches across, and has long ‘whiskers’ that can stretch up to 28 inches long.

batflower2.jpg

Tacca chantrieri

elephantflower5.jpg

Elephant Flower

Pedicularis groenlandica is a showy flowering plant in the broomrape family which is known by the common names elephant's head and elephanthead lousewort. This erect plant can grow to a height of 80 centimetres. Its sharply-toothed fernlike leaves are located low on the stout stem. The stem is topped with a large inflorescence of bright pink to purple or white flowers. Each flower has a long, pointed beak which curves upward, superficially resembling the trunk of an elephant, and the lateral lobes of the flower resemble an elephant's ears. Like other louseworts and related broomrape genera, this is a root parasite which obtains nutrients from the roots of other plants by piercing them with haustoria. This plant is found in the high mountain ranges of western North America, particularly the Cascades and High Sierra, much of Canada and Greenland. It grows in wet environments such as riverbanks.

elephantflower2.jpg

Pedicularis groenlandica

angelorchid.jpg

Angel Orchid

Habenaria grandifloriformis

Habenaria, commonly called rein orchids or bog orchids, is a widely distributed genus of orchids in the tribe Orchideae. About 880 species of Habenaria have been formally described. They are native to every continent except Antarctica, growing in both tropical and subtropical zones.

Habenaria_medusa_Orchi_2012-0921_141.jpg

Spider Orchid

Habenaria medusa

flying duck orchid.jpg

Flying Duck Orchid

Native to the Australian wilderness, flying duck orchid plants (Caleana major) are amazing orchids that produce – you guessed it – distinctive duck-like blooms.The red, purple and green blooms, which appear in late spring and early summer, are tiny, measuring only ½ to ¾ inches in length.

flying duck orchid2.jpg

Caleana major

darth vader.jpg

Darth Vader

Darth Vader plant (Aristolochia salvadorensis syn. Aristolochia Salvador platensis), a woody climber native to the humid meadows and soggy flood plains of Brazil, belongs to the Aristolochiaceae family of plants, which includes pipevines, birthworts and Dutchman’s pipe.

darth vader2.jpg

Aristolochia

salvadorensis

laughing bee orchid.jpg

Laughing Bee Orchid

The attractive bumblebee orchid or ophrys bombyliflora flowers grow in Canary Islands, Turkey and Lebanon. The large sepals, small bronze colored petals and brownish lip of this unusual flower resemble an attractive female bee. In that way this incredible flower act like female pollinator.

laughing bee orchid2.jpg

Ophrys bombyliflora

parrotflower.jpg

Parrot Flower

Impatiens psittacina, known variously as the "parrot flower" or "parrot balsam" is a species of balsam from Southeast Asia that was described by the botanist Joseph Dalton Hooker and was noted for its flower that resemble a "flying cockatoo". It is known from Thailand, Burma and parts of India.

parrotflower2.jpg

Impatiens psittacina

swaddledbabies.jpg

Swaddled Babies

The exotic swaddle babies orchid or Anguloa uniflora flowers are native to Colombian Andes of South America. The flowers have an opening in their upper parts and inside look like a swaddled baby. The flowers also have a hinged lip. The anguloa uniflora plant bloom in summer. The large waxy flowers grow 10 cm across and they are very fragrant.

Swaddled-Babies.jpg

Anguloa uniflora

happy alien.jpg

Happy Alien

First of all, the term Happy Alien actually does serve as the common name of this astounding plant. It also ranks as a most unusual species. Quite understandably, its common name derives from the unique appearance of its blooms. Furthermore, it grows naturally in only one location in the world. However, it eventually spread, presumably due to human activity. As a result, it now appears in Chile and Argentina. But, for now, it only appears there in scattered locations. In addition, it was Charles Darwin himself who officially discovered it. This amazing discovery occurred during his 1831-1836 expedition. But, other individuals previously described it unofficially as early as 1791.For the moment, the IUCN it does not yet list it on its Red List of Threatened Species. However, its restricted range does make it vulnerable. Its potential threats include habitat loss and climate change.

happy alien2.jpg

Calceolaria uniflora

tinymice.jpg

Tiny Mice

Cuphea is a low growing shrub perfect for growing in containers and baskets. Unusual bright red and purple flowers that look like little mice, hence its name, bloom in spring and right through into autumn. Attractive to bees and butterflies. Prefers sun or part shade in moist but well-drained soil.

cuphea.jpg

Cuphea llavea

Growing plants in containers

pots2.jpg

Any container will do!

Getting the best out of your pots

Where would we be without containers? In a country now where gardens get smaller and smaller, many people simply couldn’t garden without the use of pots, troughs and hanging baskets.

Hundreds of books have been written on the subject, but we’re just going to give you the basics. We’re not going to give you recipes and we’re not going to give you tips on how to look after your plants in containers….because that’s really no different to looking after plants in the garden borders.

What is very different, is how your plants rely on you doing the right thing by them, if you choose to put them in a container.

Hanging basket, pot, trough, chimney, bath or commode. Stone or plastic, fibreglass or concrete, there’s one common denominator here….

Your plants don’t have their feet in the soil, so they are very much more reliant on you to look after them.

Now, we won’t always say the same thing that the books do. You may disagree with us. And we won’t apologise for that. Over 30 years of learning how plants work, this is our take on how to get the best results. After all, we want you to achieve the best you possibly can!

pots3.jpg

Which compost do I use?

There are dozens to choose from!

We’ve written an article on compost already, but as far as containers go, we tend to recommend one type over any other, and that is JOHN INNES compost. Even if you add stuff to it, use John Innes as your base.

Above all else, you want to give your plants a really lovely quality soil, if they’re going to be in their container for a year or more. So you can forget this advice if you’re cramming bedding plants in a pot for six months….or a potful of crocus for a Spring display…. you can use a good quality multi purpose compost, peat based or peat free….you’ll get more for your money.

But for long term planting you’ll hear us recommend John Innes almost EVERY time…

Shrubs……John Innes

Perennials….John Innes

Trees….John Innes

Rhododendrons, Skimmias and Azaleas…….John Innes

Veggies……John Innes

Fruit bushes……John Innes

Alpines & herbs……John Innes (with added grit or perlite for perfect drainage)

Get the idea? Now depending on what it is you’re planting, you may need to add something like grit for additional drainage. That’s almost essential for things like Alpines and Herbs. You may want to mix in something like multi purpose compost for extra moisture retention, for plants like Hostas who like a little extra water at the roots.

But even moisture loving plants like Hostas and Astilbes need well aerated roots to get the very best results, so the next thing to consider…..drainage.

pot4.jpg

We’re here to help

Crocks always available free of charge!

Now it REALLY doesn’t matter what you use at the bottom of your pots, but please do use something. Broken bits of old pots…..what we call crocks….are brilliant, and if you ask us, we’ve always got some knocking about. In our car park, look for the big blue crate…help yourself!

You could use polystyrene broken into chunks. You could use grit, gravel or pebbles. You could even buy clay granules, but there really seems no point when other things do the same job, and are free.

How much to put in? Well, I’d go for 2 or 3 inches as a minimum. 4-6 inches is great if the pot is a good size. So there’s always a run-off for water if you overdo it, or if we have a wet spell. The bigger (or deeper) the pot, the more you can put in, since the roots won’t often colonise the whole compost space, particularly in huge pots…..the more drainage you put in, the more money you’ll save on compost! If you’re not sure, just ask.

pots4.jpg

Grow Happy Flowers

Put them in the right spot!

Common sense right? If you try and grow something that really doesn’t like where you’ve put it, you stand a good chance of being disappointed. If you’ve got a blazing hot patio, don’t plant a fern. If you’ve got a really shady spot, the only thing Lavender will do is sulk.

Choosing the right plant for the right spot is such a big part of gardening, and it’s very very easy to make mistakes at the nursery or Garden Centre….before you’ve even got home!

We all buy on impulse, especially when the plants are dripping in buds and flowers. At The Plant Man we have perhaps 70 years of combined expertise so we’ll be happy to guide you. We’ll be honest and say ‘no’ if you’ve made the wrong choice…..we want you to succeed!

pots5.jpg

Acid loving plants

Surely need Ericaceous compost?

So what about the plants which quite clearly need Ericaceous (acid) soil?

Well this is one area we may surprise you…..we’d recommend John Innes compost #3. Yes we sell Ericaceous compost, and whilst it’s good, it isn’t soil, and that’s where Ericaceous plants grow! We try and match the soil to what the plant has evolved to grow in. John Innes is the closest match. What this does mean is that once planted, you do have to feed with Ericaceous feed. But to be fair, you’d be having to do that anyway, even if you used Ericaceous compost….all bagged compost only has enough food in it for maybe the first 6 weeks of plant growth.

Which leads us to perhaps the most widely misunderstood thing about growing plants in pots…..

pots6.jpg

Feed me, Seymour!

We’re hungry!

Perhaps the biggest reason for underperforming plants in pots, is feed. More specifically, a lack of food.

Now with the exception of some very clever plants like the Venus fly trap, nearly all plants take their nutrition from the soil, through their roots. Sounds about right?

The issue with plants in pots, hanging baskets and containers, is that they rely 100% on us to provide that food. Compost, even fresh compost, has enough food to keep your plants happy and healthy for around 6-8 weeks. After that, they’ll be looking to you.

Now we all know how important watering is, and as a nation we’re actually pretty damn good at it.

But how long do you think you’d stay happy and healthy, with plenty of water but nothing else?

What many of us don’t realise, is how much food plants will need to give you their best efforts. What we also don’t realise, is that regular watering can actually remove food from the soil. It’s called leaching. Roots can only take up food that’s dissolved in water, so the more you water, the more you can actually get rid of food through the bottom of the pot. Another great reason to water sparingly (please read our blog on watering).

We’re not going to go into feeding in too much detail, it’s another subject in its own right. Come and speak to us if you’re not sure, but do feed regularly in the growing season. The results really can’t be argued….

If you’re feeding densely planted containers; bedding plants, hanging baskets, then they want lots of food, lots of the time. We’d always suggest liquid feed, remember any food has to be dissolved in water for the roots to use them, so liquid feed is ready and waiting to be used. We’d suggest watering at least once a week, twice a week would give you results which will stop your neighbours in their tracks!

For more perennial plantings, trees and shrubs, it’s easier to use a controlled release fertiliser….quite simply, you’ll only need to feed 2 or 3 times a year, rather than once a week.

pot7.jpg

That’s all folks!

It’s really pretty straightforward

So, we think those are the key points to growing plants successfully in pots.

  • Use a compost they’ll love, add extra drainage/compost/fertiliser if necessary

  • Put some drainage material at the bottom of the pot

  • Match your choice of plant to the position your pot will occupy

  • Water regularly, but don’t overdo it

  • Feed regularly with the right food

And if in any doubt, ask us…we love to help….and we’re pretty good at it. We want your sunflower to be happy!

How do I prune my Wisteria?

wisteria8.jpg

I don’t want to wait 10 years!

How can I make it flower?

Right up there with Clematis pruning questions, we’re asked pretty much weekly what customers can do to help their beautiful Wisteria flower. So we’re going to try and show you how this is done.

Are you paying attention?

Well before we dispel a couple of myths, you need to start with one factor which without, quite simply your Wisteria will never…..ever….ever flower its little socks off…..

sunshine.jpg

It all starts here…

No sunshine = no flowers

It’s as simple as that. Wisteria need sunshine to flower, plain and simple. The more sunshine it gets, the more flowers you’ll be rewarded with. Don’t get me wrong, Wisterias will grow beautifully in shade, they’ll be verdant, vigorous, but very much lacking in flowers!

Why? Well, so many plants which produce flowers on older wood, need their wood to be ripened in the sunshine to inititate a good set of flowers. That’s not to say they won’t grow well with very little sunshine…they will! But we grow Wisteria for its flowers. Sunshine is kind of compulsory.

Years ago I listened to BBC’s Chris Beardshaw who told the audience that if a plant doesn’t earn its keep in your garden, get rid of it! And I wholeheartedly agree with him. There really is no point giving house room to a plant that just doesn’t perform for you.

So…..sunshine is vital. Agreed?

Now most flowering plants only need pruning once a year to give you their best show; Wisterias need it twice, and I’m sure that’s why people get a little apprehensive about pruning them.

I promise you it’s easy. I also promise you that if you do it a little bit wrong, you won’t hurt your prize Wisteria…..unless you raze it to the ground, it will recover quickly from ‘over-ambitious’ pruning!

So, let’s begin. Wisteria is a climber and although it can be grown as a wall plant, a pergola plant, it can be grown as an arch, against railings, or even as a tree…..the technique to encourage flowers is always identical.

Being so vigorous, Wisterias have a real habit of becoming overgrown all too quickly…..and if that happens, it gets harder to see the wood for the trees (sorry).

So if you prune it each year to prevent this, you’ll save yourself a lot of work. Let’s assume you have a Wisteria that’s fairly mature, and it’s Summertime. Round 1….

By August or September, your Wisteria could be looking something like this….

wisteria9.jpg

A mass of shoots

Where do I begin?

All a Wisteria wants to do is grow, grow and grow. It’s an Asian climber and it’s spent millions of years evolving to climb trees with its prehensile shoots. Unhindered, it could easily reach 30 or 40 feet into the canopies of trees.

Your mission…..if you choose to accept it…..is to use your secateurs to curb its enthusiasm!

wisteria3.jpg

Be ruthless…

You won’t regret it

OK, so take a look at your Wisteria and you’ll very soon notice that it’s produced masses of green extension growth on whippy stems, sometimes these could be 10 feet long or more. The most important thing to identify is where the growth started from. It began growing from one of last years stems, and above all else, this is the bit that’s most important. Trace that long whippy shoot back to the main stem, and identify where it began. It would look something like this….

wisteria10.jpg

That’s it!

A green shoot coming from a brown stem

Just to the left of the secateurs, that long green shoot has sprouted from one of last years shoots, which is now woody and brown. If you can learn to identify this point of growth, suddenly Wisteria pruning is a piece of cake!

So, basically, get this……you cut back EVERY SINGLE ONE of these long, green whippy shoots back hard. In August or September. As a rule of thumb, count about 6 leaves from where the green shoot comes out of the brown one, then snip everything else off. Easy, right?

Your Wisteria will lose nearly all of its growth that it’s worked so hard to produce this year. And I promise you, that’s a very very good thing.

wisteria2.jpg

Six leaf stems remaining

or 5…..or 7……

So you see what we’re trying to achieve? To the right of the secateurs (at approximately 2 o’clock) can you see where last years stem finishes, and this years stem begins? It looks like a little brown circle. It really doesn’t matter if there are six leaf joints left, or a few more. This is just Round 1.

Are you ready for Round 2?

wisteria4.jpg

Now wait until Winter

and wrap up warm!

So you’ve done all the hard work back in Summer. Winter pruning is still important, but it’s a lot easier as your Wisteria will be bare…..so you can see everything clearly.

So those long whippy shoots, which you reduced to around six leaf joints, will by now have changed colour from bright green to a greyish colour. And it’s time to trim them by half. I’d do this in January or February.

The chap above is just about to trim one of the Summer trimmed shoots back to half of it’s buds (those black things clinging closely to the stem). He’s identified three good buds on a tiny bit of this years stem, and he’s going to take the rest off, leaving something like this….

wisteria12.jpg

10 feet of growth….

Snipped to just 3 or 4 buds….

Can you see then, that all of that lush, vigorous growth has been curtailed and restricted to just three or four buds?

Why do we do this? Well, that’s easy, Because in a year or so, you’ll see these thin black buds turn into big fat buds, and when you see those big fat buds you’ll know you’ve achieved success…..because they’re going to be your flowers!

wisteria13.jpg

Mission accomplished

You are now officially an expert!

Don’t forget that Wisteria does it’s thing on older wood. It takes a year or two for those thin black buds to develop internally, to become fat flower buds. But if you adopt this technique every year, and you’re growing your Wisteria in full sun, I promise you will achieve success!

So what about this ‘takes ten years to flower’ myth? Well, it is. And it isn’t. These days, Wisterias are generally produced commercially using something called a nurse graft. Grafting is used on lots of plants (apple trees and roses for example), where it’s necessary to use a different root to encourage a favoured attribute….in this case, flowering.

So, if you buy a Wisteria from a nursery or Garden Centre, it’s always wise to find out first if it’s a grafted one (they aren’t always…but ours are!)

If you try and grow a Wisteria from seed (which of course happens naturally in the wild), there’s every chance it may take 10 or 20 years to flower. Equally likely, it may never flower!

You could, of course, take cuttings from an established plant, but without the correct root to help it, again it may not flower like its parent. It’s one of those plants we’d wholeheartedly recommend you buy from a reputable source, buy it grafted, and be prepared to pay good money for it. There’s really no point scrimping on a cheap plant if it’s not going to flower, right?

As a rule of thumb, even when it’s grafted, all Wisterias don’t all flower at the same time. In our experience, the whites and the very pale mauves always seems to reach flowering maturity first (often flowering here at the nursery), the traditional blues and mauves tend to take a year or so longer, and the really deep purples tend to be the last to start (varieties like ‘Black Dragon’). So again, depending on your choice, don’t be surprised if even a grafted plant doesn’t flower immediately. It’s quite normal! And it is just a rule of thumb….Mother Nature is firmly in charge and often proves me wrong!

Do hope this helps…..don’t forget we’re always very happy to help here at the nursery, if you’re not quite sure where to start.

Happy snipping!

Slugs & Snails

In lots of ways the most destructive of our UK garden pests, and the bane of many gardeners lives, these pesky critters do so love to nibble on our prize plants. I’m sure many meet their fate under the wellie boot of many of you!

Which of course might be satisfying for a fleeting moment, however what you really want to know is how to stop the little beggars…

SNAIL.jpg

Our nocturnal enemies

And how to stop them!

Well, there’s good news in that the gardener has lots he can have up his or her collective sleeve, to try and limit the damage they’ll do to your treasured perennials and your delicate annuals.

They say prevention is better than cure, so that’s what we’ll concentrate on…because once the damage is done, you’ll be left with some very tatty leaves!

mulch.jpg

Obstacle courses

Make it hard for them! Strulch is one option.

Slugs and snails move, as I’m sure you know (yuk), via a mucus membrane on their ‘foot’. They need moisture to move around and won’t like dry, rough surfaces. For that reason, a garden mulch is a huge obstacle to them. Now you can use all sorts….grit is said to work well, and gravel, but not everybody wants to but these all over their borders as they aren’t organic. And without a membrane underneath, they can get really muddy and become ineffective.

Bark mulch is perhaps the coarsest, and works really really well against slugs and snails. It’s important to put on a thick layer, I’d suggest 3-4inches (7.5-10cm) at least, to really hamper the little sods!

mulch2.jpg

Coarse Bark mulch

Really helps to ruin their eating habits!

There’s also a lovely product which we now stock, called Strulch, an organic mulch made from mineralised straw. It goes a long way, it ‘knits’ together once it’s been applied so tends not to blow around like coarse bark. And boy oh boy it looks WONDERFUL when it’s down.

We’re one of the only stockists at the moment in this part of the UK, after being recommended it by a customer, we thought we’d give it a whirl. And we’re very glad we did! At £8.50 per 100L bark, its marginally more expensive than bark (£7.50), but we think it goes that little bit further.

Now you probably already know that mulches like this are always best in dry weather, as the surfaces dry well and slugs just don’t want to try getting over them, for fear of kicking the sluggy bucket.

The other advantage of course, is that mulches really help to control weeds by preventing germination. It slowly rots into the ground, improving the soil, increasing populations of earthworms, and keeps moisture in the ground for your precious plants.

Only one problem with that, of course….we’ve all ended up in the UK and its beautiful but unpredictable Summers! So much as a good thick bark mulch is a huge bonus, it isn’t foolproof.

So what else can we do?

barrier.jpg

Use barriers

to protect your babies

If you grow your prized possessions in pots, then certain barriers have been proven to significantly reduce slug and snail problems. Now since plants like the gorgeous Hosta grows really well in pots, this could be a really good way to concentrate your efforts on the plants you really want to protect.

Copper tape has been used to good effect for many years, and I have to admit I’ve always been a little bit cynical…until I read up on it. Copper causes a static discharge of electricity when the slug or snail happens upon it. Watch a video on the internet and you’ll see that they hate it! Definitely worth investing to keep your potted plants tatter free.

pennies.jpg

Break open your Piggy Bank!

Put your coppers to good use!

There’s evidence to show that copper coins can also help, if used in the tops of pots. Being copper plated, there’s no reason that they wouldn’t work in the same way as copper banding….it’s probably cheaper too!

vaseline.jpg

Another use for Vaseline?

And why not….

The more you delve into the subject, the more you discover weird and wonderful remedies for beating slugs & snails. So it seems that Vaseline is also widely used in the perennial fight against these pesky molluscs….apparently the best results are when the Vaseline is mixed with table salt, then applied around the edge of pots in much the same way as copper tape. They are not only repelled by the Vaseline, but run a mile from the salt too! Of course other Petroleum Jellies are available…and if you look on Amazon you’ll save yourself a fortune compared to the brand leader!

Enough to buy a little bottle of Eucalyptus oil and add a couple of drops to make it even more effective?

On a similar vein, Vicks jelly is also said to work well. Admittedly quite messy to apply, but if placed around the rims of your pots of plants, the stuff should last all season long…probably best not to move them around too much after smearing jelly all over them!

crushed-eggshell.jpg

Fried, poached or scrambled?

Doesn’t matter…just don’t chuck the shells!

Another traditional remedy said to work well by many, is the application of crushed eggshells around the base of your beloved plants. The sharp, rough edges are not welcomed by the slimy critters, so be sure to use a good layer, ideally 2 inches wide (5cm) in a band around your plants, so they can’t cross it easily. And the shells will slowly release nutrition into the soil too!

slugbuffet.jpg

A buffet for birds

Bigger birds love ‘em!

Now you may already know thrushes love snails, it’s such a shame their numbers are on the decline. But slugs are beloved by magpies, and other members of the crow family. So you could always (if you can bear it) create your own island of water in a big saucer, and see if any locals would like to help themselves to a free buffet! Its the perfect way to get rid of them if you’re an insomniac and find yourself inspecting your borders in the middle of the night!

beer.jpg

Fancy a pint?

What a way to go!

Now this one is tried and trusted, and at least the little beggars won’t know what’s hit them…it appears any old beer will do and I’m not sure many of you fellas** will object to pouring a little of your favourite tipple in a dish, if it returns a catch like this! Beer traps are available everywhere, but there’s a hundred DIY options too…

** Apologies for any sexism here….I’m not sure they like Prosecco as much?

coffee.jpg

Or a coffee instead?

That works too!

OK, so not a coffee trap as such, because they hate it! But if you have a hankering for caffeine, then used coffee grounds are said to work wonders, especially if used as a half inch thick ring around your favourite plants. Now the more entrepreneurial ones among you can chat up your local coffee shop (goodness knows there are enough of them), and I bet you’ll get all the used coffee grounds you can handle. Added to their repellency, they also decompose into the garden soil, adding lots of nutrition, trace elements, and help to lower the pH, which is a great thing for lots of plants in the garden!

nemaslug.jpg

Invasion of the Body Snatchers

Great for Summertime

Thank goodness for scientists. There’s always something interesting to discover in nature, and this time, they’ve found some little worms called nematodes, whose favourite meal is, you’ve guessed it….slugs! We use a similar product on the nursery, to control the larvae of Vine Weevil, and we reckon we get a 99% success rate. They are amazing. Now you won’t find these in Garden Centres as they have a limited shelf life, so you have to send away for them. But as long as you follow the instructions, we think these are definitely worth a try. Temperature sensitive, they won’t provide year round protection I’m afraid.

slugstop.jpg

Slug pellets

Organic or chemical….

‘Slug Pellets’ have long been accepted to do the job, although they’ve been swamped in controversy over the years, as they kill slugs and snails by the use of the chemical metaldehyde, which some say can then enter the food chain through birds eating the poisoned slugs and snails. The manufacturers dispute this, and it’s not for us to take a side. All we will say is that used sparingly, they work a treat. It’s up to you if you wish to use them, or take advantage of the many chemical free versions available these days, like Slug Stop from Growing Success.

garlic.jpg

So what do we use?

Give you three guesses…

So after all the various options open to you, where do you stand? Well all we’d say is to give the non-chemical options a go first. And if, after all that, you still struggle, by all means give the traditional metaldehyde pellets a go.

What will we do? After committing to growing over 6000 Hostas this year (yes 6000!), we’ve done lots of research and we are not using any chemicals whatsoever, at least until we’ve exhausted our first options.

First, we will be growing our pots of hostas on a base of stone chippings, so that the ground itself will hopefully remain fairly dry for the majority of the time. Slugs and snails hate it dry, so that should help massively.

Second, we’re going to begin a spray programme based purely on the use of garlic spray. Slugs and snails prefer bland salads! Anything with too much flavour and they will tend to leave it alone….so we’re hoping to trick them by thinking they’ve crawled into a fancy restaurant…

Would you like the recipe?

Boil two full bulbs of garlic in 2 litres of water, until the bulbs are soft and squidgy. break the cloves up with the back of a fork, and strain the mixture, removing all skins and garlicky bits, so you’re left with an ‘aromatic’ elixir.

This is your concentrate, so decant it into a bottle once cooled.

Use two tablespoons of the concentrate mixed in 5 litres of water, and use this to water over the leaves of your Hostas, ideally in the afternoon and ideally on a dry day where possible. We’ll use a knapsack sprayer, but there’s nothing wrong with a watering can.

The garlic taste will linger on the leaves and act as a wonderful natural deterrent, but will need reapplying regularly, we’ll be doing it once a week.

And that’s it. So we really have only one more thing to say…..

snails.jpg

THIS IS WAR

Make sure you’re well armed this year!

Which compost do I need?

This is perhaps one of the top 5 questions we get asked every day, and with the array of different brands and types available, you’re not alone!

ogc.jpg

Soil conditioners

We’ll begin with our biggest selling line, which is about the best value bagged conditioner at only £2.50 each. Although its called a compost, which can be a little misleading, it really is designed to dig into soil to improve it or to spread over the soil to act as a mulch. If you plant your new plants directly into it, you won’t be impressed!

Our other best selling Soil Conditioner is our Farmyard Manure, well respected and widely known to help improve every kind of soil, be it sand, silt or clay.

These two products do pretty much the same thing; one is animal based, whilst the other is blended from composted green waste….a perfect example of recycling to benefit plants and gardens, without the need for peat.

compost2.jpg

Multipurpose composts

Good all rounder for different uses

We offer 3 different types of multi purpose, all subtly different but each with their own advantages.

The Bord na Mona compost is the very same which we grow over 100,000 bedding plants in, each and every year. Never once has it let us down. We’re proud to use this one on our own nursery, and we hope it will give you confidence that if we use it, you should get the very same results!

We also offer a multi purpose with added John Innes compost, from another Irish company, Erin. This adds more weight and drainage to the product and if you’re growing plants in pots, we’d steer you to this one instead.

Please note that both of these products are ‘peat reduced’. They do contain peat, but alternatives to peat are added to reduce to overall use of peat. We no longer support 100% peat based composts.

Finally, we’ve introduced a 100% peat free multi purpose compost, to enable those of you who are passionate about peat reduction, to grow beautiful plants. We do advise buyers of our peat free alternative, to carefully monitor watering, as peat free compost tends to need less water than more proprietary peat based composts.

compost3.jpg

For your acid lovers

Rhododendrons. Skimmias, etc.

If you’re trying any plant which loves acidic soil conditions, then our Ericaceous compost is a good bet. It’s pH is lower than our other composts, so it’s perfect for any lime hater. Rhododendrons, Azaleas, Camellias, Skimmias, Magnolias, even Hydrangeas prefer this type of compost, along with many other species.

If growing Acid lovers in pots, we do recommend an addition of some soil based John Innes compost #1, and the long term feeding with an Ericaceous fertiliser (we sell several here). John Innes is better for long term planting than peat based composts, so a mixture of the two works wonderfully in pots.

If growing Acid lovers in the ground, use Ericaceous to enrich your soil, and supplement this mix with a longer term Ericaceous fertiliser slow release granule. We’re happy to show you.

compost4.jpg

John Innes soil

It’s what most plants would choose….

If a plant could choose what it could grow in, we’re sure that 99% would choose John Innes.

Why? Easy. It’s the closest thing we can offer to the ‘perfect’ garden soil. Don’t forget that all commercial nurseries use peat based or peat free composts, as they are cheaper, lighter, and easier to transport.

John Innes is heavy, mostly because it’s soil based. And where do most plants grow? In the soil!

So whilst it isn’t commercially viable to grow in, because it’s too heavy to transport, it remains the best compost to grow in at your home.

We offer 4 types, all identical in structure, but different in nutritional;

SEED is very low in nutrition, so it’s perfect for seed sowing, which can suffer if sown in a compost too rich in nutrition.

#1 is perfect for pricking out your seedlings. Slightly higher feed levels than seed, but still safe and not too strong.

#2 is great for potting on relatively young plants.

#3 is by far the best product for planting young and semi mature plants into their final positions…..particularly when growing plant in pots. For growing in pots, we’ll always recommend John Innes over our multi purpose composts.

For growing plants out into the garden borders, you’d be better to buy more organic based products to dig into your own soil….you’ll get far more for your money.

strulch.jpg

Our mulches

Worth their weight in gold!

Now technically, you could use lots of things as a mulch. The definition of a mulch is really something that will retain moisture (you could use plastic), reduce weed growth (you could use carpets), and improve soil structure (you could use gravel!)

The first of our two biggest selling mulches are without doubt our bark mulch, widely recognised to do all of the above. But on top of this, it’s natural, it’s organic, it’s compostable, and it’s attractive.

Always lay your mulch at least 2-3 inches deep, or 5-7.5cm. Any thinner and it’ll just blow away. You can lay it thicker than this, but the thicker it goes on, the more it will cost per square metre.

And always try and lay it after good rainfall, so you keep the moisture in! Autumn and Spring are perfect, much better than Summer.

Our ‘New Kid on the Block’ is Strulch, that’s a mulch made from mineralised straw. Finer, lighter and arguably more attractive than bark, it looks just wonderful. It goes quite a long way, too! We are beginning to use this product around the nursery to show people just how good it looks, and we’re very excited to see how it performs.

Don’t forget that regardless of what you choose, no organic mulch will control perennial and deep rooted perennial weeds like docks, nettles and bindweed….unless you’ve got control of these first. If you haven’t, I’m afraid they’ll grow straight through your lovely mulch. What mulch WILL do is stop new weeds germinating on your borders and wreaking havoc. To control perennial weeds, come and see us and we’ll happily give you our advice.

How do I prune my Clematis?

This is perhaps the question we get asked more often than any other single question at the nursery, so we thought we’d try to explain….

clem1.jpg

Dead or Alive?

It’s sometimes hard to know!

Well of course if you look closely you’ll see that the Clematis in the picture is well and truly alive, but hampered by a lot of dead looking growth. Clematis are without doubt one of the UK’s most popular climbing plants, and with a tiny amount of know how, it’s so easy to know how to look after each type. So here goes….

clem2.jpg

The early ones

We call them ‘Group 1’

OK, so there’s a little bit of science, I promise it won’t be super-boring.

Group 1 Clematis always flower at the beginning of the year. These clever little sausages make all of their flowers, inside the stems of the plant, the preceding Summer. They’ll get their flowering out of the way in April & May, they’ll have a little rest to recover themselves, and then they’ll work hard to produce their flowers before Winter comes. You can’t see them but I promise you, they are there, sitting in the wings, waiting to wow you when they emerge in the Spring.

If you can remember that, then common sense will tell you how to prune them. If you prune them in the Winter, and you prune hard, you’ll have a lovely Clematis the following year that is, well, very very green. No flowers….because you’ve chopped them all off!

If you prune it in August or September, because it’s got too big and you really can’t deal with it, guess what….you’ll get hardly any flower next year because you’re pruning it a the precise time its beavering away to make them all.

If you prune in Spring, it’s the same as pruning in the Winter….bye bye lovely flowers.

So, there’s one time to do it, without compromising your display for the following year…..PRUNE STRAIGHT AFTER FLOWERING.

That way, as the plant recovers from pruning by producing new shoots, it’s still got all Summer to work on producing new flowers too. Does that make sense?

We should add that if you’re happy with the size of the plant and it’s not outgrown its’ stay, you do not need to prune it. Plants don’t get pruned in the wild, after all. It’s a great way to control the size of your plants when gardening in a confined space, but it’s not essential, especially if it’s a youngster and you actually want it to gain in size.

That’s Group 1’s….prune immediately after flowering, as hard as you like, if you need to.

clem3.jpg

The ‘Dinner Plates’

We call them Group 2’s

Now these are the Clematis everyone knows and loves as traditional Clematis. The flowers can be enormous. They can be double or single. And they normally flower between mid May and late June, although that’s not set in stone.

Group 2’s are very much like Group 1’s, in that they produce their main crop of flowers for May/June, the preceding season. So in lots of ways, they are very much the same as Group 1’s….prune them hard in Winter or Spring, and you’ll end up with lovely, healthy green plants, with almost no flower.

For this reason, the advice is pretty much the same….PRUNE IMMEDIATELY AFTER FLOWERING.

There are a couple of subtle differences though. Whereas Group 1’s you can pretty much prune as hard or as soft as you like, we do recommend always pruning a Group 2 back to around waist height, give or take.

Why? Well, couple of reasons for this. Since they don’t have the enormous vigour of some of the Group 1’s, waist height gives the plant a good chance to produce ample growth the following year so that when it flowers, those lovely flowers are positioned in a perfect position for you to enjoy them….at around 4-8 feet. Any taller and you won’t appreciate them….let alone the leafless twigs at eye level, needed to transport water to the flowers doing their thing above your head….they’ll be topheavy and ugly.

When pruning to waist height, also take out any really small, thin, weedy stems….the more you prune out weak growth, the more the plant will respond by producing strong growth instead.

The other lovely lovely thing about Group 2’s, is that after your waist-high pruning, your plants will most likely reward you with a second flush of Summer flowers. Now they won’t be big dinner plates, and if you’re growing older double varieties, they’ll most likely just be single, but flowers are flowers, right? They will enhance your walls and trellis beautifully, as a ‘thank you’ for looking after them!

Which leaves one group left….

clematis4.jpg

The late Summer ones

We love them to bits!

Now you don’t need to be a super duper detective to know that these are called the Group 3’s! And they work quite differently from the Group 1’s and 2’s.

Why? Easy….they do everything in a single season. No forming flower buds the previous year. They’re the sprinters of the Clematis world and they want to grow quickly, before they give you a jaw dropping late display of flowers.

What that means is that they start into growth in Spring, grow nice and fast with long supple stems, to gain as much height as they can before they erupt into flower in mid-late Summer. If you’ve never grown these before, give one a go. It’ll add yet another season to your early and mid season Clematis and be flowering into August and September without question!

They also happen to be the easy peasy ones to prune. You just grab them by the scruff of the neck in January or early February, and cut THE WHOLE PLANT back to about 6 inches (15cm) from the ground. Brutal, effective, and oh so satisfying! The plant will love you for it, and you’ll never be left with old, brown, dead stems which really don’t look appealing.

Easy, eh?

clematis5.jpg

Pruning when planting

As a one-off….

Any plant, once planted, will benefit from pruning to some degree. Talking about this often causes frowns on otherwise happy faces, but I promise you that if you can de-stress a plant in it’s first few weeks after planting, the long term success of that plant is pretty much guaranteed.

What do you think is the most stressful time in a plants’ growing year? Well, it’s when the plant is trying to provide as much water and nutrition as it can…..and that’s at flowering time. Ironically, that’s the time that most people buy their plants…..and its the very same time you want to minimise stress on your new purchase.

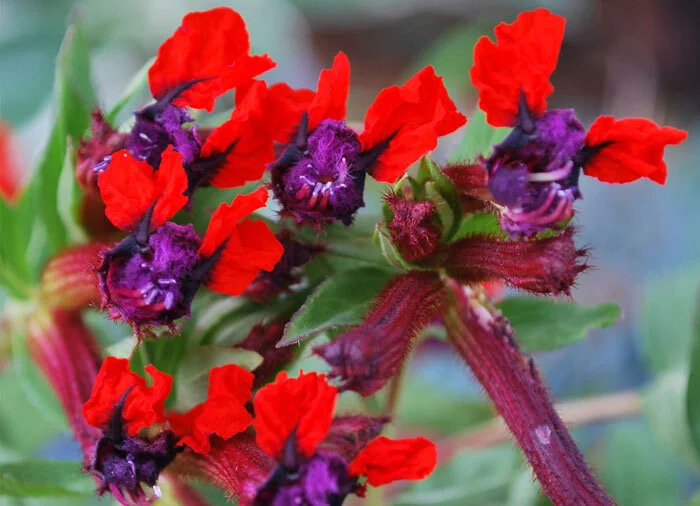
The easiest way to do this…. and please don’t hate me…..is to chop all the flowers off when you plant it. In fact the easiest thing to do, is to chop the whole plant back to around 12 inches (30cm) to allow if to settle down, recover, and most importantly, recover with renewed vigour, more shoots, and a much better chance of success. The flowers you’ll lose in year 1, will be repaid indefinitely in all of it’s future years. And clematis will give you 20 years of joy if they like where they are…often far longer!

So, prune it confidently at planting time, and while we’re talking about planting, you can plant it deep. Look at the picture above, and you’ll see it’s being planted perhaps 4-6 inches (10-15cm) deeper than it was in the pot. As far as planting like this goes, Clematis really are the exception; we wouldn’t recommend this with any other plant.

You see, they like their roots cool, and deep planting helps. As long as the soil at the bottom of the planting hold is well dug over and not compacted, those big golden bootlace roots will venture down to the cool soil, and keep the plant very very happy.

It’s also said that deep planting helps avoid the dreaded Clematis Wilt disease, although contrary to popular belief, it’s really only the Group 2’s which suffer from this, neither Group 1 or 3 Clematis are susceptible. So deep planting is a great idea for the big flowered Group 2’s, it’s not quite as important for the others.

I hope this helps make it a little simpler. Try to hold on to your plant labels in a safe place so if you’re not sure which one you’ve got, you have a record somewhere at home. And if you lose your labels, don’t fret….you can easily determine which group you have, by the time of year that it flowers.

I don't like Roses, they're too difficult!

Roses are a quintessentially English thing. Although introduced from distant shores hundreds of years ago, the Brits embrace roses like few other countries.

No wonder they are often voted the UK’s favourite flower.

Strange, then, that they are also often voted the UK’s least favourite flower.

‘I don’t like roses, they’re too difficult’. Really? Please read on…..

Time to dispel some myths…

Let’s hear it for the rose!

bee.jpg

Pests on roses

Is it a big deal?

So, let’s be honest, we’ve got millions of pests in this country. Whether or not you choose to grow roses or not, you’ll be faced with pests of some sort on each and every plant you choose to grow, at some point.

In their favour, they rarely attract Vine Weevil, the bane of all gardeners lives these days….tick!

They’re rarely attacked by scale insect, causing horrible black sooty mould which is a pain to control…..tick!

Slugs and snails generally leave them well alone…..tick!

They do attract the stunning Leaf Cutter Bee without causing any significant damage….tick!

Seriously, they do attract greenfly and blackfly, but are they really reason not to grow them? Nah of course not, they’re a doddle to control.

clay soil.jpg

They don’t like my soil

Really?

We’re often asked by our customers which plants are best for the soil which surrounds us in the Leicestershire & Northamptonshire areas. Particularly around us, is predominantly clay soil.

Guess what? Roses LOVE clay soil, and they’re in our Top3 of plants to grow in clay. So if you live round here, in our opinion you should be giving them a go as you are only playing to their strengths!

Given a sandy soil, you’d need to bulk out the soil with lots of organic material, compost, manure, etc. That way they’ll stay nice and moist and not dry out, which causes perhaps the biggest reason people don’t like roses…..

mildew.jpg

They get diseased!

which spreads to other plants…

OK, so do they? Yes they do. They can get Mildew. Black Spot. Rust. There’s no refuting that.

Is it enough of a reason to not grow them? Well, not in my book.

Roses aren’t the only plant in this country to get disease, not by a long chalk. Most plants will suffer from time to time, but it helps to know that a little like us, diseases will take a hold when we’re not at our best. We’re far more likely to come down with something when we’re a bit run down, and roses….in fact, all plants…..are much the same.

So, how to avoid diesases? Well that’s actually quite easy. Firstly, position roses where they want to be….

roses.jpg

We love the sun!

We hate the shade.

If you plant them in the shade, they’re going to get disease. Plain and simple. If you have a shady wall, and you plant a ‘shade tolerant’ rose, chances are you’ll get disease. When we ‘tolerate’ something, we’re not loving it, are we?

So if you take my advice, ignore what the books tell you. If you want a problem free rose, put it in the sun. If you only have sun for part of the day, put it where it gets sun in the afternoon. Agreed?

happy.jpg

Keep me happy!

And I’ll put a smile on your face

If you’re planting your rose in a heavyish soil (with a bit of compost please!), and you’re putting it in a sunny spot, you’re more than halfway there to a very happy rose. A happy rose is a healthy rose and that means it’s less susceptible to disease. So the only other things you need to do really are….

  • Don’t overcrowd with loads of other plants and roses around it. Give each plant a chance to grow, unhindered.

  • Keep them well watered. The second a rose dries out too much, it’ll succumb to disease much quicker.

pruning.jpg

Pruning helps!

We'll show you how; just ask!

So once you’ve got your position right, your soil right, and you’re keeping your rose well watered, there’s still a couple of tricks to keep disease to an absolute minimum. Pruning has to be right up there.

The days of hard pruning roses down to ground level every year, should be long gone by now. And like it or not, I’ll tell you why….

Pruning, amongst other things, encourages growth. You prune it down…it grows back stronger.

So the harder you prune something back, the more growth it will try and recover.

Roses will grow back quickly once pruned, and the harder you prune them, the faster they’ll want to grow back. Quick isn’t great though, it means the growth will be soft and susceptible….that means it’s more likely to get disease.

So the advice of the 60’s and 70’s isn’t great any more. Back then, when the pollution in the air was greater, things like sulphur in the air meant that diseases didn’t cause much of a problem, no matter how hard you pruned your roses.

Now, of course, with the clean air act, the contaminants that kept diseases at bay have all but gone. So hard pruning is bad.

Instead, prune your roses lightly, taking off no more than a third of the growth each Spring, and taking out central growth so you’re left with a nice open shape where disease won’t get a hold. We like to call it ‘goblet’ pruning, so your shoots are on the outside, and there’s nothing on the inside….

keep it open.jpg

Pruning a rose

to keep it open and disease free

So when it gets a little congested, you help keep the air flow through the plant by taking out the central stems. The more air moves through the plant, the less problems you’ll have….

Perhaps the final thing in your armoury as a gardener, is the use of sprays and chemicals. Now we stopped using lots of these a long time ago, but in the world of disease, prevention is better than cure.

Why? Easy. Chemicals can no longer cure diseases. If you buy a bottle of fungicide now, I PROMISE you it won’t cure a disease. They are a little misleading because you’d expect them to, right? Wrong. They are designed for you to spray regularly as a barrier, to stop them getting disease in the first place. That’s why we don’t use them, it seems like an unnecessary use of chemcials.

Instead, we use a fertiliser to combat disease called Uncle Tom…..

uncle tom.jpg

A Miracle Cure

Recommended by British Rose Growers Association

So instead of a chemical, what this actually does is to create disease resistance by making the plant healthier. It slows the growth rate down, so the plant produces stronger, healthier leaves and shoots which creates a barrier against fungal infection.

We use it here on all of our roses. It’s wonderful stuff and lasts for years in the bottle. One bottle would last a couple of seasons at least!

rust.jpg

A disease free rose?

They do exist….

I’ll leave with one last thought. Much as there ARE disease free roses like R. rugosa, a pretty hedging rose, most roses we all know and love will, at some point, get a disease of some sort at some point in their lives. It’s important to understand that at the end of the season, as the plants get ready to drop their leaves, disease will become more noticeable, and really does no damage at all. Once the leaves drop, sweep them up, and the rose will be clean from anything as it re-grows the following Spring. Easy!

As always, the team is on hand to answer anything you’re not sure about. You only need to ask….

Watering.... when to water and when not to!

I’m fairly certain that Tracy and Jason, who grow all of our lovely plants here at the nursery, sometimes/often/always roll their eyes at me when I come to talk about watering.

Watering correctly is without doubt, the one single factor that is responsible for creating strong healthy plants (with strong healthy roots), or poorly grown, weak plants with a small root system but a big susceptibility to pests and diseases.

I could bore you to death with all I’ve learned about watering over the last 30 years. I’ve seen it done well in nurseries. I’ve seen it done terribly. And the results are always identical. Water well and you get a good plant. Every time.

overwatering2.jpg

Killed with kindness

A dead, deceased Peace Lily. Overwatered!

underwarering.jpg

Not too late…

Underwatered, but still able to recover.

There are subtle differences to tell you if it’s overwatered or underwatered, but the easiest one is common sense….feel the soil, or pick the pot up. It should tell you all you need!

The subject of watering is vast. I’m very passionate about it, because done properly, your plants will thrive. Done badly, they won’t. Mother Nature is amazing and teaches us all we need to know, if we’re prepared to listen to her.

Over the last 30 years, I’ve learned loads. I still do, every day. And I’ve learned that if you get everything else right, watering is still the bit that lots of people get wrong. It’s enough for a new gardener to be put off such a wonderful, healthy hobby, and that would be a great shame.

So, at The Plant Man we’ve come up with a fairly constant rule, and we try to stick with it whenever we can….

watering.jpg

If it’s still wet, don’t water it!

It’s our mantra….

I’ve seen commercial nurseries with plants grown well all over the UK. I’ve seen them grown badly. And I reckon the one factor above all others, is how the nurseries choose to water their plants.

It’s scary how lots of Garden Centres will entrust the most important of all duties, to the poor weekend boys and girls who can only do their best. And if they aren’t told how to do it, it’s no wonder Garden Centres can get a bad name for not knowing how to look after their plants.

So we do use this mantra above all else. And there’s one overriding reason…..we don’t want to overwater our plants.

An overwatered plant is almost certainly going to die if it isn’t allowed to dry out. The water takes all the air out of the soil, and it’s that air which is essential for good root growth. No air = dead plant, and, to steal a famous phrase, ‘not a lot of people know that’…

Soil and compost is full of airspaces. Sandy soil has big ones….so it dries out quickly. Clay soil has little ones, so it holds onto water better.

But all soil types have airspaces, and almost every plant will do better if there is plenty of air available at all times.

Let me explain….

swim.jpg

Fancy a swim?

If you’ve ever been brave enough to take a swim off sunny Scarborough, you’ll know how it takes your breath away. Cold, right?

Water stays colder than air, and takes much longer to warm up. The more water you give a plant (particularly in the colder months), the colder it’ll stay…the more it’ll sulk…..and then it just won’t grow as well.

A plant grown in a well drained soil (one where excess water drains easily, allowing for moisture AND big air spaces for the roots to breathe) will always outperform a plant which is growing in a cold, wet soil.

Makes sense? So how about this….

Do you crave water when you’re not thirsty? I know I don’t. So do you think plants are any different?

They really aren’t. If a plant has adequate water, I promise you it won’t appreciate being bombarded with water every time you get the hosepipe out. It’ll feel just as cold as the brave lady swimming in the serpentine above!

Overwatering causes roots to rot. Too much water in the soil pushes all the air out, and the roots end up swimming in water and unable to breathe. We’d perish in minutes if we had to hold our breath, the poor old roots won’t last more than a few days before they start to die. And once a root rots, it simply stops working. Ironically, a wet boggy soil stops the plant being able to use water if that makes sense. This is why overwatering, unless caught quickly, normally commits your pride and joy to an early grave.

It’s also why an overwatered plant and an underwatered plant can often show similar symptoms.

Underwatering, by comparison, rarely leads to the plant dying. If a plant gets dry, it uses millions of years of evolution to save itself, and the main way of doing this is to wilt. It’s trying to save itself. The roots are still perfectly happy but it’s telling you it needs water! You’ll be amazed how quickly they’ll recover….as long as you catch them in time.

polytunnel.jpg

Our magic houses

We’d be lost without them

You’d be forgiven if you thought we grew all of our plants in heat, to grow them quickly.

But you’d be wrong.

In a world where seasonality is disappearing and you can now buy summer bedding plants in January, we are very old school and we use no heat. Not in any of our growing tunnels.

Our lovely Rachel on the tills does seem to perform better at 30 degrees, but that’s another story….

Our polytunnels are used to keep plants healthy, by keeping them dry. It’s as simple as that.

Without wanting to sound like a bore, a dry plant has more air available a the root. If it’s drier, it’s warmer. If it’s warmer, it grows better for us. We grow over 100,000 bedding plants here at The Plant Man, looked after religiously by Tracy and Jason. We start them in March and April, when frost is still a huge problem. But they stay dry in the tunnels, and the guys water them only when they need it. Then they leave them alone.

And guess what? We are able to grow stronger, healthier, more resilient plants than anyone else I can think of. All because they are watered with care, attention, and very keen eyes.

So, that’s about it! It’s a huge subject I could bore you for days on, but I won’t. I think it’s perhaps the most important aspect of keeping your plants happy, and at the same time, it’s actually one of the easiest to remember…..

watering.jpg

If it’s already wet, don’t water it!

Easy, right?

So, next time you visit us, and you pick up a plant which might feel a bit light, I hope we might have explained why. If it’s wilting, tell us for sure and we’ll get straight on it. But if it looks happy and vibrant, guess what…..it is!

Planting, a fool proof guide to success!

We’re very proud of the fact that we hardly ever get plants returned to us. We take a great sense of pride in always trying to ensure our plants are fresh, not rootbound, young and vibrant. Anything too old, we work hard to move it on at a reduced price, or we pot it on to keep it growing.

So, you should feel confident that your purchases from us should have lots of vitality to ensure your chances of success are high.

But it’s not as easy as that!!

We want every one of our plants to succeed, and we want you to have confidence in everything you plant from us. So there are a few tips which you really can’t go wrong with….

  1. Everything starts with the soil! If the soil isn’t right, your new addition won’t be happy, plain and simple. Since nearly all plants are grown in compost, and nearly all gardens have soil nothing like compost, guess what….you need to add compost! Chuck in two or three handfuls for a smallish pot, increasing with the size of the plant you’re planting (we’ll always advise if you’re not sure).

compost.jpg

Black Magic!

Don’t plant your new plants without a few handfuls of compost to help them on their way. It’s not too important which one you use, it’s all about improving soil structure and they’ll all do that! Your new babies will love you for it!

2. This is a good time to add fertiliser too, for planting we’d recommend Bonemeal or some of the new mycorrhizal fungi to help the roots develop well….there are lots of differing views on fertilisers these days and to be blunt, as long as you don’t overdo it, you’ll do no harm.

Whereas Bonemeal simply gives a boost of phosphates to encourage root growth, some studies show that it takes a long time to benefit the plant. Using naturally occurring fungi to work together witht he plants’ roots, has been proven time and again to massively increase the food available to the plant, and consistently gives amazing results for plants planted in the ground (not so much in containers). We recommend it 100%

mycorrhiza.jpg

Feed it!

Mycorrizal fungi effectively give your plant a second root system which massively increases the nutrition available to them. It’'s amazing!

3. Water your plant BEFORE you plant it. We think this is the bit which accounts for
most plants dying in their first few weeks. Compost is great, but not without
its disadvantages. The biggest pain is that when compost dries out too much,
it’s a royal pain to get wet again! So you’re best to soak your new plant in a
bucket of water for 5-10 minutes, so they are soaked.

soak.jpg

Soak it!

Even if it normally likes dryconditions, ignore that for now and soak it before you plant it. 5 or 10 minutes will be enough as long as you use a big bucket


4.   Plant in the lovely mixture of soil/compost, with grit if necessary, you’ve created.
If you can’t see enough of a difference between your newly mixed soil and your
standard garden soil….you haven’t added enough compost! With a few exceptions,
always plant your new plant at the same level as it’s growing in the pot you’ve
bought. Too shallow and it may be unstable in wind, or exposed to cold. Too
deep and you might even kill it.

planting.jpg

Plant with care…

Try and handle by the rootball if you can…the younger the plant, please handle with care; bruising the stem of
very young plants can really slow them down.


5. Firm it in well, but don’t murder it. This is a really important stage so that your babies don’t move around too much after planting.The more you push down or heel it in, the more
air you’re taking straight out of the soil, that you’ve worked so hard to put
back in. General rule of thumb; the bigger the rootball you’re planting, the
firmer you can be.

firm.jpg

Steady now….

Whether you use your hands or your feet, firm the plants in to settle them but don’t be too brutal. Remember those roots need lots of air to thrive….

6.  Water it in! Give it a good soak to settle the soil naturally around the rootball.
This then prepares your new plant for it’s next few weeks of watering, which
we’ll cover in another addition to the blog.

When you water a new plant in, water where it needs it….at the roots or in the soil. Watering overhead, particularly on a bigger plant, mean the water hits the leaves and doesn’t hit its mark. It’s a waste of your time, a waste of water, and your new plant simply won’t benefit.

Get the water right at the base of the plant, and at the soil immediately around the rootball. The rootball is already wet because you soaked it already. Now you want to wet the area around the plant, so the roots have something nice a moist to start working into. And boy do they do this quickly. Roots will hunt out new territory immediately, and often within 24 hours they start growing out. Clever things, aren’t they?

water1.jpg

BAD!

water2.jpg

GOOD!

8. Looks like you’ve planted your new addition perfectly!! Now time for a cuppa….


cuppa.jpg

Now what’s next on the list….

Don’t forget we’re always on hand to answer anything you’re not quite sure about!